Tuesday, 20 August 2013

Sisters lay out

Wow can't believe its been so long since I've posted........:(
 
So much has happened I've started full time work so now spare time is rare. I have done a few projects but not like before full time work took over my life :) I've been busy creating memories and not printing photos and scrap booking so will have lots to scrap in the near future xx
 
I created this summer Layout yesterday " Sisters " thought I'd share,
Love this photo of my girls was taken a while ago in 2010
 
 
close up of title and punched strips detail

 
Hand made paper rose finished with bling in the middles.
I stamped the swirls in pink ink but wasn't as dark as I hoped so I added detail with a fine pen
to make it stand out.
 
 
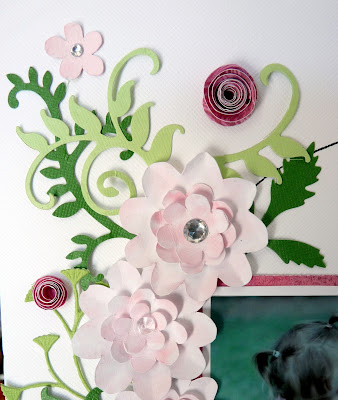
detail at the top of my page


This is the latest page that I made with my crop kit
"Albie"
My beautiful cat and Daughter back in 2000
 
 
Close up of title

 
Detail for flowers hand cut, inked and layered

 
Yay my Dad and his Fiancé got married :)
I made the wedding invitations
 they were so pleased with them xx
 
 
detail of the bow, keys and bling pin :)
 
 
Thanks for looking
Sadie x
 

Saturday, 13 April 2013

YAY it's CROP DAY :)

I LOVE CROP DAY!!!!
 Once a month I get to spend the whole day with my scrappy friends we create, chat and eat cake xxx
at the papermaze crop in Otley
 
Here's what I created with this months page kit........
Using this weeks sketch from Scrap your story challenge blog
 
"BFF"
 
Had this photo of me and my BFF Suey for a couple of years now.
I've been wanting to scrapbook it for a while as not got many photos of us together.
We spend all our time talking and laughing (No time for photos)
when I see this months kit I thought I have the perfect photo :) xx

 
Here's the sketch I rotated it 180'


Close up of my embellishment cluster

 
I added a butterfly as I'm wearing one.......:)
 
 
2nd embelli cluster


"Family"
 
This is my 2nd layout using the kit


I punched the vellum for a detailed soft look


Thanks for looking
Sadie x

Wednesday, 10 April 2013

Just for fun

I cant seem to resist a good sketch at the moment so when I see a sketch pop up on one of my favourite blogs scrap paper scissors by Tracee I decided to have a go :)
Pop over to see Tracee's fab take on the sketch I liked the simple background and all the little embellishments she placed next to her great photo x

Here's my take on the sketch
 "sweet"


I used the scrap papers left over from Papermaze's July's crop kit to create my layout.
July crop kit page"Peacock butterfly"

 
TIP- When making my rosette I sprayed my circles with water then scrunched up and let them dry before layering. This gave them a distressed look around the edges and gave more depth to the finished rosette.

 
I grouped my pieces together Inked and faux stitched.
 
 
Thanks for looking
Sadie x

Monday, 8 April 2013

My minds eye sketch contest "BIG bed"

I have recently been using sketches to help me to produce more layouts. I find taking part in a contest with a dead line pushes me on :) I don't always complete a layout in one go I some times do a bit over a few days until I'm happy with the result.

Here's my take on the Aprils sketch challenge at Page maps blog by My minds eye.

"BIG bed"


Here's the sketch that I used I rotated it sideways.
I liked this sketch and spent a while shuffling my paper circle lol......x


The sketch only had room for one photo and I'm a multiple photo scrapper,
 I find it hard to choose just one photo so I came up with this solution where I could use three.
I used a clear bag designed to put cards into with a sticky flap,(I used this to stick my photos to the page) and reinforced the fold with brown card.


Close up of detail, I used a mask and wiped brown ink over it for my background. The ribbon and buttons detail are used to pull open the photo flap :) I made the rosette by punching a strip of paper folding an accordion fold and gluing together.


I rubbed ink onto my Dollie, drew faux stitching and added bling to finish off my embellishments.


I added bling and buttons to my background to give a bit of detail and texture.


Thanks for looking
Sadie x

Sunday, 24 March 2013

" 2 of a kind " Embossing sketch challenge

I was so pleased to be chosen as Scrap your story top 3 last week :) 
 when I see the challenge this week was embossing I decided to give it ago.
 
 follow the link to this weeks challenge at scrap your story challenge #4 embossing good luck x
 
2 of a kind
Made with Bobunny "love letters papers and note worthy".
 
 
Here are my embossed pieces that I used.
TIP- lightly ink over the embossing to make it stand out.
I also used embossing powder,
I sprinkled it onto my page and used the heat tool under the page to set it.
 
 
As well as taking part in the embossing challenge
I've used this months page maps sketch.
 
Instead of the journaling above the photo I added another photo :)
 
 
Here you can see the embossing powder, Title
and my super cute heart paper clip that I found on pinterest.....


Close up of embellishments and embossing.......xx
 
Thanks for looking
Sadie x

Saturday, 23 March 2013

Yay top 3

Yay I'm sooooooooooo pleased to say that I got chosen as one of the top 3 this week
for scrap your story sketch challenge :)
with my layout "Chillax"
Thanks a lot enjoyed the challenge. This weeks challenge is to use embossing on your layout.
 
Had a great week as got a new job too................ :) :) :) YIPEEEEEEE
 
 
Thanks for looking
Sadie x
 

Monday, 18 March 2013

Chillax layout

This month at papermaze I decided to do my own thing.
 I used the kit but created a completely different layout by following the sketch on
 I do enjoy using sketches but as you can see I also enjoy a twist by rotating and adding bits :)
 
Chillax
Here's my Layout that I'm entering for the sketch challenge.
My daughter chillaxing on the sofa.
 
 
Here's the sketch that I used, I rotated it but kept the photos in the same position.
I moved my group of embellishments to touch my photo top right and added a group at the bottom :)
 
Top embellishments layered punched shapes and Ali Edwards circle of love stamp.
 
 
Bottom embellishment


The original page kit by papermaze
Sorry for the quality its a photo of a printout x
 
 
I also managed to get a second layout done whilst at crop which is usually unheard of as to busy talking :)
 
Be My Hula Girl
I used my minds eye papers Lime twist really love these cute papers.


Be my is a heart post it note, I used washi tape buttons and paper scraps and finished with bakers twine and faux stitching. 
 
 
I made these embellishments from  boarder punched scraps and the flower
from circles cut free hand, scrunched, inked and layered finished with a button and bling.
TIP- scrunching helps to give texture and depth to layers.

 
Thanks for looking, If you like what you see please feel free to comment and share :)
Sadie x


Friday, 15 March 2013

Easy gift Ideas

I had a few occasions coming up all at once so decided to make a few cute gift sets.
I managed to make all 3 in a day.
 
The first was "Nan" for my Nan's Birthday.
 I don't know about you but my Nan is always difficult to buy for especially with her birthday being so close to mothers day.
 
 
I started by printing the word Nan, reversed in word onto the back of a piece of white card stock. (make sure the word will fit into a 6x4" box)
I can provide step by step instructions if needed.
I cut out the letters with a craft knife.
TIP- if you cut onto glass you get a neater finish (I use an old chopping board).


I backed the word with floral paper and taped into place on the back.
To finish I punched out 3 small flowers, inked them and finished with a button and bling lol
hence Buttons Blooms and Bling............. xx
The embellishments are stuck directly onto the out side of the glass frame with glue dots,
So the word lies flat in the frame.
 
I decorated a small candle with paper scraps to match.
 
 
Using the same technique I made this sweet little "BABY" gift for my daughters teacher who's expecting a little girl very soon xx
 

I also decorated a matching candle with scraps.
 
TIP-You will notice from this photo that I haven't cut out the letters completely.
the middle of the B and the loop have tabs to stop them falling out. Before cutting out the letters mark with a ruler on the reverse of the word where the tabs need to go.

 
And finally "FRIEND" for my other daughters friends Birthday.
 

I made a layered paper flower finished with a button and string
and fixed to the frame using hot glue.
 
 
Thanks for stopping by
Sadie x